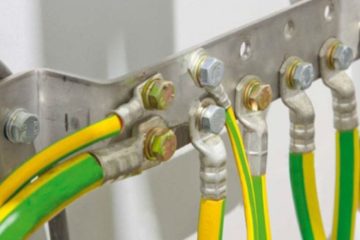
Ensuring that your home’s electrical system is properly earthed is crucial for your safety. Earthing (also known as grounding) is a process that transfers discharged electricity from an appliance directly to the ground, preventing electrical shock and other hazards. While modern homes are required to have proper earthing systems, older homes may not, leaving their electrical systems vulnerable to faults.
At Just HardRich Global Resources Limited, we are dedicated to providing top-notch electrical power and control engineering services across Nigeria. We believe that every home deserves to be safe and secure, and ensuring proper earthing is a big part of that. In this comprehensive guide, we will walk you through the process of checking earthing in your home. If you encounter any issues or need expert help, remember that our team at Just HardRich is always here to assist.
Why Is Earthing Important?
Before we delve into how to check earthing, it’s essential to understand why it’s important. Earthing protects you and your home from electrical shocks by providing a direct path for the electricity to flow into the ground in case of a fault. Without earthing, excess electricity from a faulty appliance can flow through your body when you touch it, leading to dangerous and potentially fatal electrical shocks.
Moreover, proper earthing prevents electrical fires. In the event of a short circuit, the earthing system will direct the excess electricity into the ground rather than allowing it to spark a fire. Therefore, regularly checking and ensuring proper earthing in your home is vital.
Method 1: Testing with a Lightbulb
One of the simplest ways to check if your home’s electrical system is earthed is by using a lightbulb. This method doesn’t require any specialized tools and can be done with basic materials available at any hardware store.
Step 1: Assemble Your Tools
To start, you’ll need a 100-watt lightbulb and a base socket. The socket should have two wires attached to it for easy testing. Ensure that the base socket is compatible with a 100-watt bulb to avoid incorrect results.
At Just HardRich Global Resources Limited, we recommend using quality materials from trusted brands to ensure accuracy in your tests. You can find these materials at most hardware stores, or you can contact us for recommendations on where to source the best electrical components.
Step 2: Strip the Wires
Using a wire stripper (or a pair of scissors if you don’t have one), strip about 1/2 inch (1.3 cm) of insulation from the ends of both wires on the base socket. This will expose the wiring and allow you to connect it to your outlet.
Tip: Be careful not to cut through the wires themselves. A clean strip ensures that you get an accurate connection when testing.
Step 3: Test the Outlet
Insert the stripped ends of the wires into the live and neutral ports of your outlet. The live port is usually the smaller slot, and the neutral port is the larger one. If your outlet is functioning correctly, the lightbulb should illuminate.
If the light doesn’t turn on, there may be an issue with your outlet’s power connection. In such cases, it’s advisable to contact a professional. Just HardRich Global Resources Limited can help you diagnose and fix any power issues in your home.
Step 4: Check the Earthing
Next, unplug the wires from the neutral port and insert one of them into the earthing port (the third hole, either at the top or bottom of the outlet). Reinsert the other wire into the live port. If the lightbulb shines just as brightly as before, your outlet is properly earthed.
If the bulb doesn’t light up or is dimmer than before, your outlet may have faulty earthing. In such cases, it’s critical to have your electrical system inspected by a professional. At Just HardRich Global Resources Limited, we specialize in identifying and fixing earthing issues to keep your home safe.
Method 2: Checking Earthing with a Multimeter
For a more accurate assessment of your home’s earthing, you can use a multimeter. A multimeter measures various electrical parameters, including voltage, and is a reliable tool for checking earthing.
Step 1: Set Up the Multimeter
Begin by setting your multimeter to measure AC voltage. On an analog multimeter, this is usually represented by a “V” symbol with wavy lines next to it. If you’re using a digital multimeter, simply select the AC voltage setting.
Ensure that the cutoff value on your multimeter is set to the highest available setting. This ensures that you capture the full range of voltage during testing.
Step 2: Connect the Leads
Multimeters typically come with two leads: one red and one black. Plug the red lead into the port labeled “V” or “+,” and the black lead into the port labeled “COM” or “-.” This setup will allow you to test the voltage in your outlets.
Always inspect the leads for any signs of wear or damage before using them. If you notice any cracks or exposed wires, do not use the leads. Faulty leads can lead to electric shocks or short circuits.
Step 3: Measure Voltage Between Live and Neutral Ports
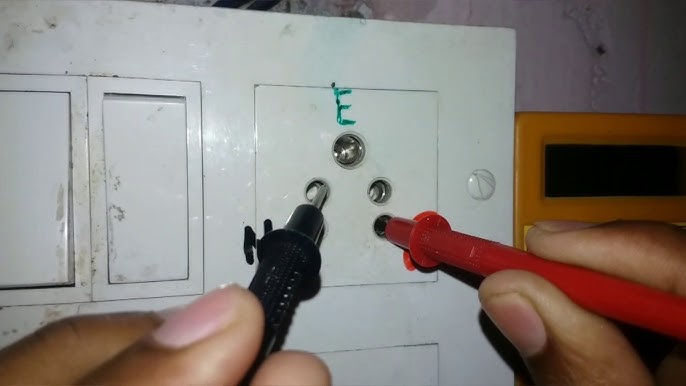
Insert the red lead into the live port of the outlet and the black lead into the neutral port. Note the voltage reading on the multimeter. A typical reading should be around 230V for homes in Nigeria.
Testing an outlet that you know is functioning correctly beforehand will give you a baseline reading to compare your results.
Step 4: Measure Voltage Between Live and Earthing Ports
Next, remove the black lead from the neutral port and insert it into the earthing port. The voltage reading should be similar to the one you recorded in the previous step (within 5 volts). If the reading is close to zero, your outlet does not have proper earthing.
This step is crucial in determining the safety of your electrical system. If your multimeter shows no voltage or a significantly lower voltage when testing the earthing port, contact Just HardRich Global Resources Limited immediately for professional inspection and repair services.
Step 5: Measure Voltage Between Neutral and Earthing Ports
Finally, test the voltage between the neutral and earthing ports. Insert the red lead into the neutral port and the black lead into the earthing port. The reading should be a small value, typically less than 2 volts. If the reading is significantly higher, there may be a leakage issue in your system.
Step 6: Calculate Leakage
To ensure your system is safe, calculate the leakage by subtracting the first voltage reading (live to neutral) from the second (live to earthing). Then, add the voltage reading from the neutral to the earthing ports. The result should be less than 2 volts. If it’s higher, it indicates a potential issue with your earthing system.
For example, if your readings were 230V (live to neutral), 231V (live to earthing), and 0.5V (neutral to earthing), the formula would be (231 – 230) + 0.5 = 1.5V. This would indicate a safe system. However, if your result is greater than 2V, you may need to have your system checked by a professional.
Trends and Innovative Tools in Earthing Systems
As Nigeria continues to advance in technology and infrastructure, there are innovative tools and methods available for checking and maintaining earthing systems. At Just HardRich Global Resources Limited, we stay updated on the latest trends to ensure that we offer cutting-edge services to our clients.
1. Smart Multimeters
Smart multimeters can connect to your smartphone via Bluetooth, allowing you to monitor your electrical system in real time. These devices provide detailed reports and can even send alerts if they detect a problem. If you’re looking for a modern, convenient way to check your earthing system, a smart multimeter is an excellent investment.
2. Ground Resistance Testers
A ground resistance tester is a specialized tool that measures the resistance between your earthing system and the ground. This tool provides a more in-depth analysis of your earthing system’s effectiveness and can identify potential issues before they become serious problems.
At Just HardRich Global Resources Limited, we utilize the latest tools and technology to ensure that your electrical system is safe and up to code. If you’re interested in upgrading your earthing system or want to learn more about the tools we use, feel free to contact us.
Conclusion
Proper earthing is essential for protecting your home and family from electrical hazards. By following the methods outlined in this guide, you can check the earthing in your home and ensure that your electrical system is safe. However, if you encounter any issues or are unsure about your results, it’s always best to consult a professional.
At Just HardRich Global Resources Limited, we are committed to providing top-quality electrical power and control engineering services across Nigeria. Whether you need a routine inspection, a repair, or a complete system overhaul, our team of experts is here to help. We pride ourselves on our dedication to safety, innovation, and customer satisfaction.
Don’t leave your safety to chance. Contact Just HardRich Global Resources Limited today for all your electrical needs.


